

If you are looking at getting into live streaming – whether on Twitch, YouTube, or another platform – OBS is a great free open-source application that will help you achieve this goal. This guide will help you from start to finish to successfully begin live streaming.
Download and Install
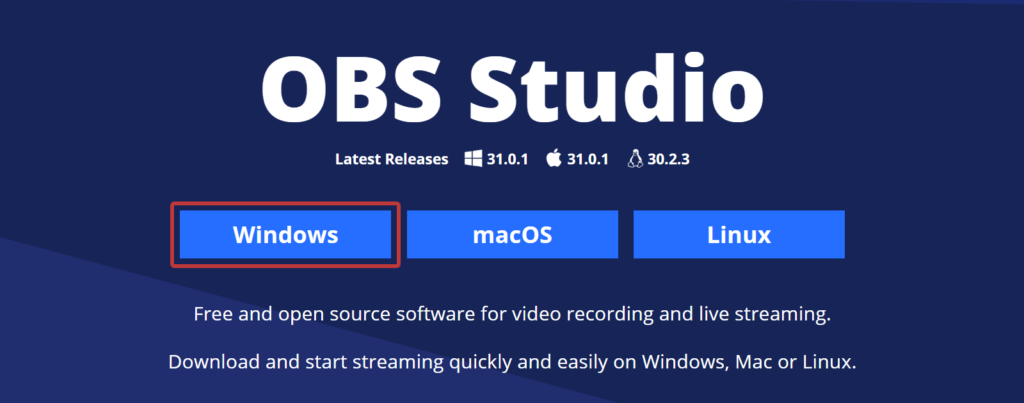
OBS is available as a free download from their website here. Once on their website, select the download for either Windows, macOS, or Linux, depending on your operating system (this guide is for Windows, but setup is similar on other systems).
Open the installer and follow the instructions to complete the install
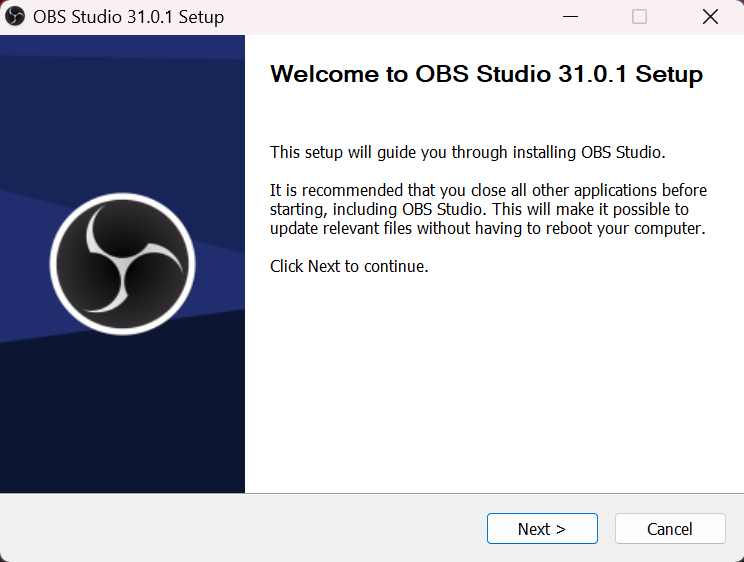
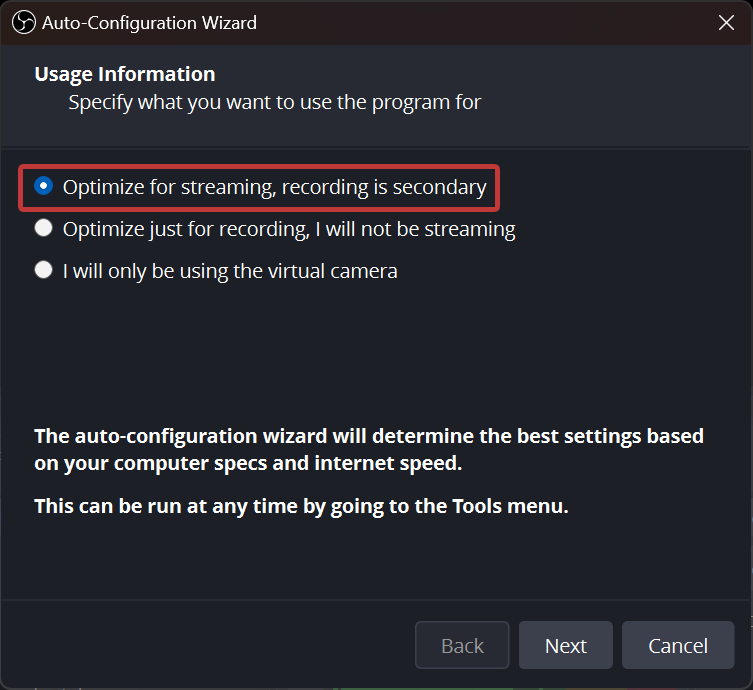
Once the installer finishes, you are ready to launch OBS. On initial launch, OBS will ask you what you plan to use the software for. Select “Optimize for streaming, recording is secondary” and click next.
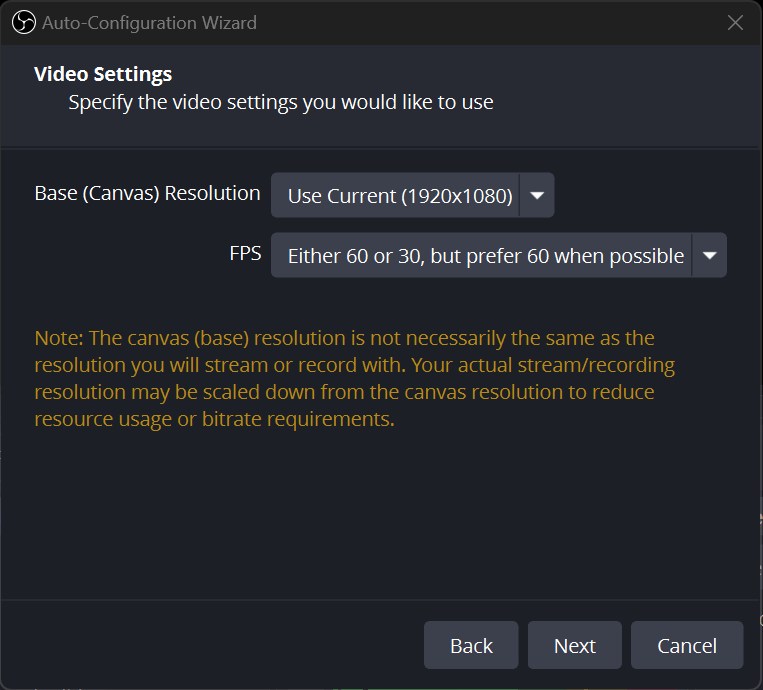
Base canvas and FPS will depend on your computer and network connection, but for now select 1920×1080 for base canvas size and 60 for fps.
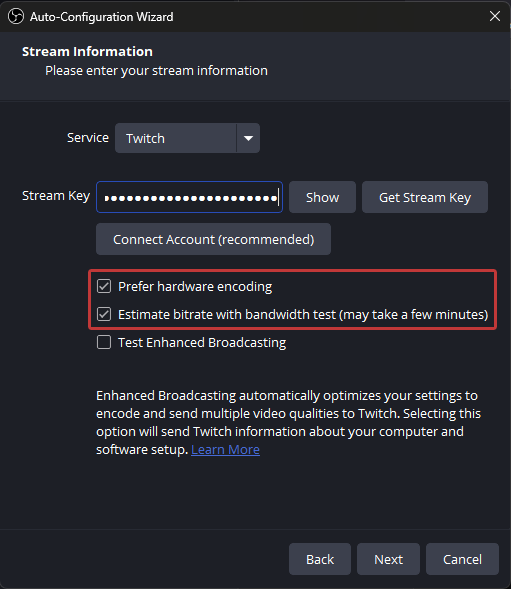
Next you can choose to connect to the website you plan on streaming to (this makes the process quicker than using a stream key). Setting up during this step allows you to estimate the optimal bitrate with a bandwidth test. You can choose to exit out of the setup if you wish to connect your account later.
Settings and Configuration
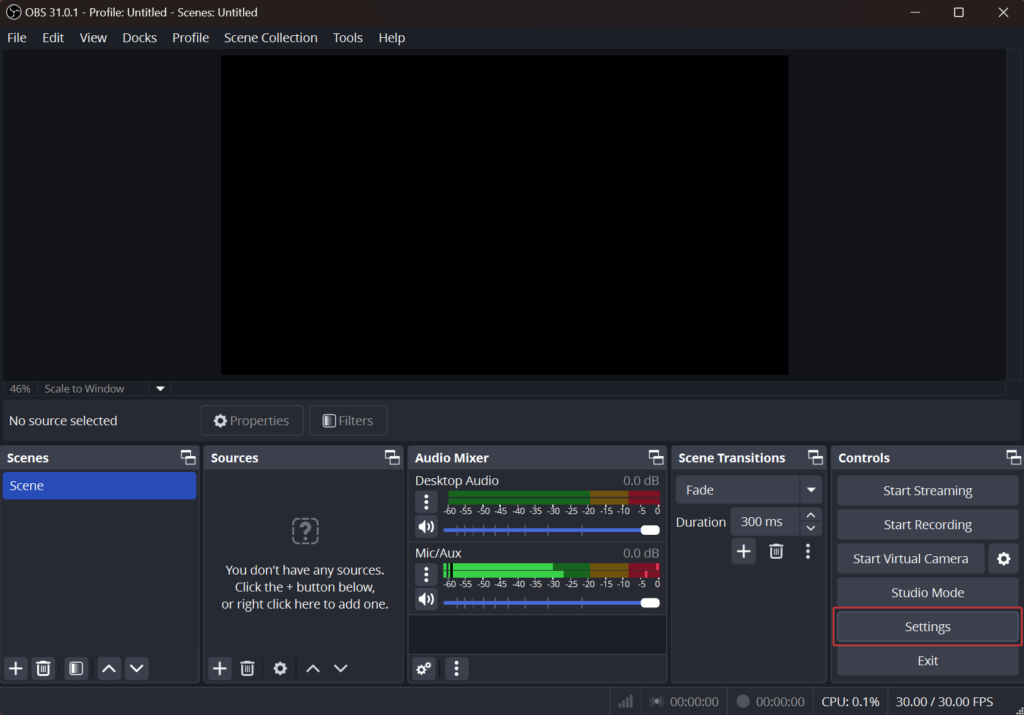
If this is your first time using OBS, it may look intimidating. While the application offers a lot of in depth features, configuring it for streaming does not have to be complicated. Navigate to the settings tab located under Controls on the lower right. This will launch a settings window where you will configure your settings for streaming.
Stream
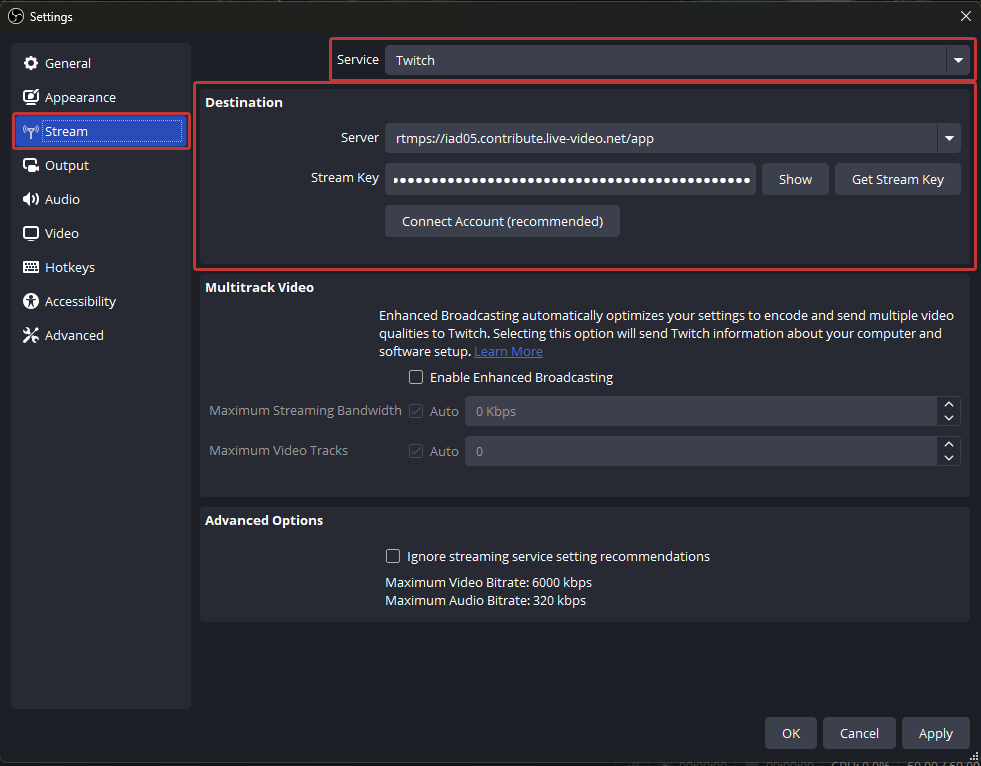
The stream tab is where you will select the platform you are wanting to stream to. Platforms like Twitch and YouTube offer a “Connect Account” button that makes it easy to pair OBS with the platform. If you prefer to use a stream key, that option can be selected and the stream key can be entered. Below is how to find your stream keys for Twitch and YouTube.
How to find Twitch stream key
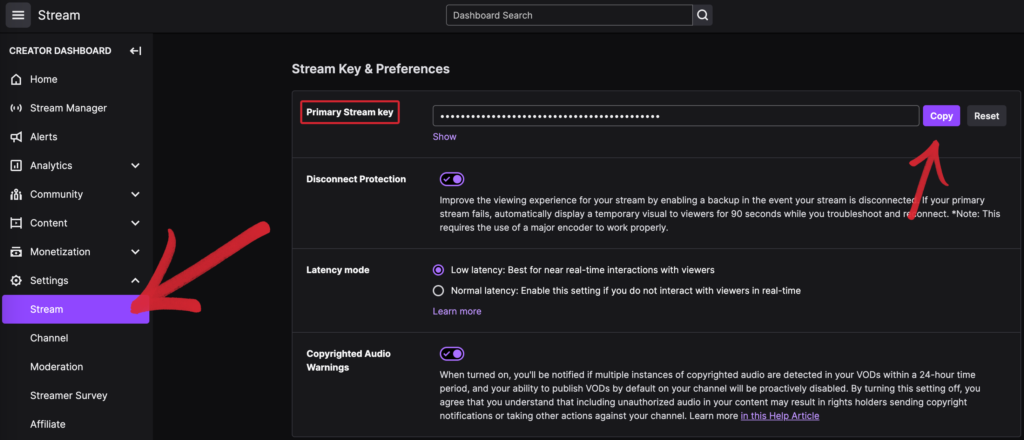
Your Stream Key for Twitch can be found on the Creator Dashboard under Settings > Stream. The Stream Key can be copied from here and pasted into OBS.
How to find YouTube stream key

In order to find your YouTube Stream Key, navigate to YouTube Studio, then click Create > Go live (if this is your first time going live on YouTube, you will have to wait 24 hours to access the YouTube Studio page and access your stream key). Select Streaming software as the source type.
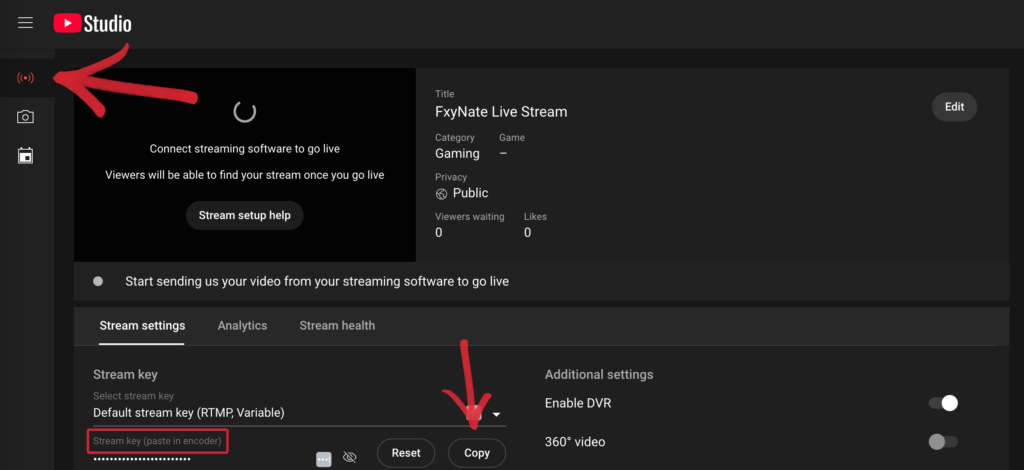
Once on the Stream page, under Stream settings there is a section labeled “Stream key” where you can copy your stream key to paste into OBS.
Output
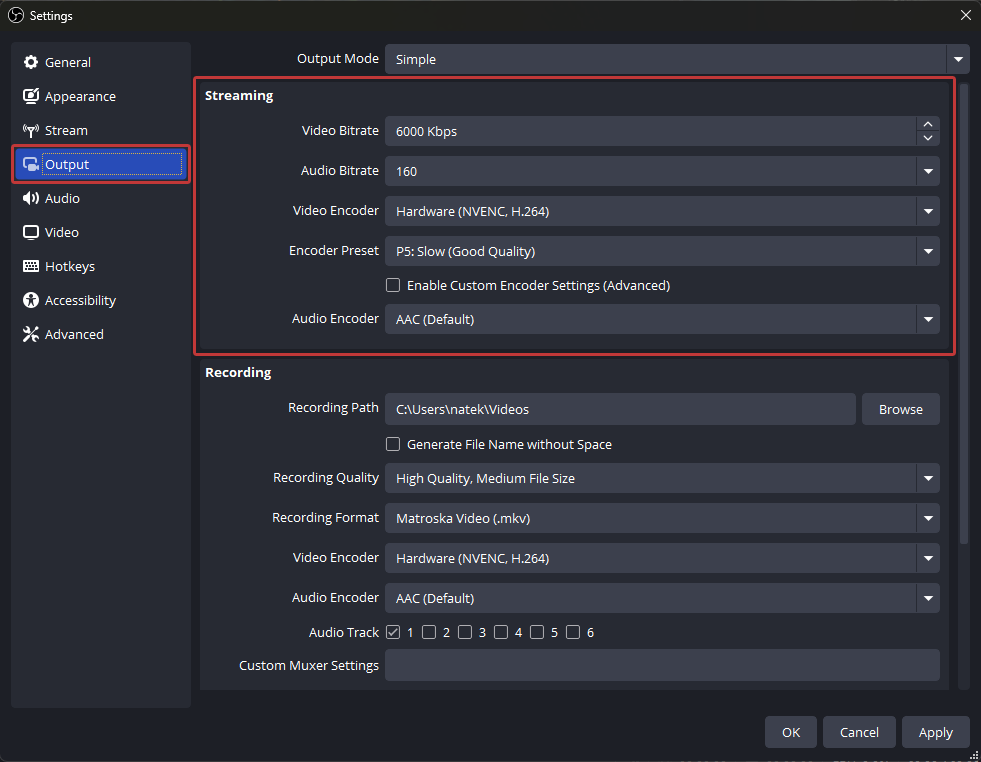
Once OBS is connected to a streaming platform, you are ready to move on to the Output tab to configure network settings. First things first, make sure Simple is selected under Output Mode.
Video Bitrate is an important setting that will depend on your network upload speeds. Speedtest.net will provide you with your upload speeds and help you in determining what quality settings you can go with.
Different platforms have different recommended bitrates depending on resolution and frame rate. For example, Twitch recommends a bitrate of 6000 Kbps (6Mbps) for a 1080p 60 fps, while YouTube recommends between 4000 to 12,0000 Kbps depending on the codec used. Recommended specs can be found here for Twitch, YouTube, and Facebook.
Video Encoder needs to be set to Hardware, which will use the processing power of your graphics card, instead of your CPU. If you have a 2000 series Nvidia GPU or newer, you can select the “NVENC” hardware option under Video Encoder. 2000 series Nvidia GPU’s and newer have a dedicated hardware encoder called NVENC which handles the encoder process of your livestream. This prevents game performance from being compromised while streaming.
Encoder Preset largely depends on the hardware you are using. If you are using a decicated encoder like NVENC, you can use a higher quality preset since it does not impact the performance of your games. If you are using a graphics card without a dedicated encoder, the preset can be tailored towards performance if you notice an impact on your fps.
Video
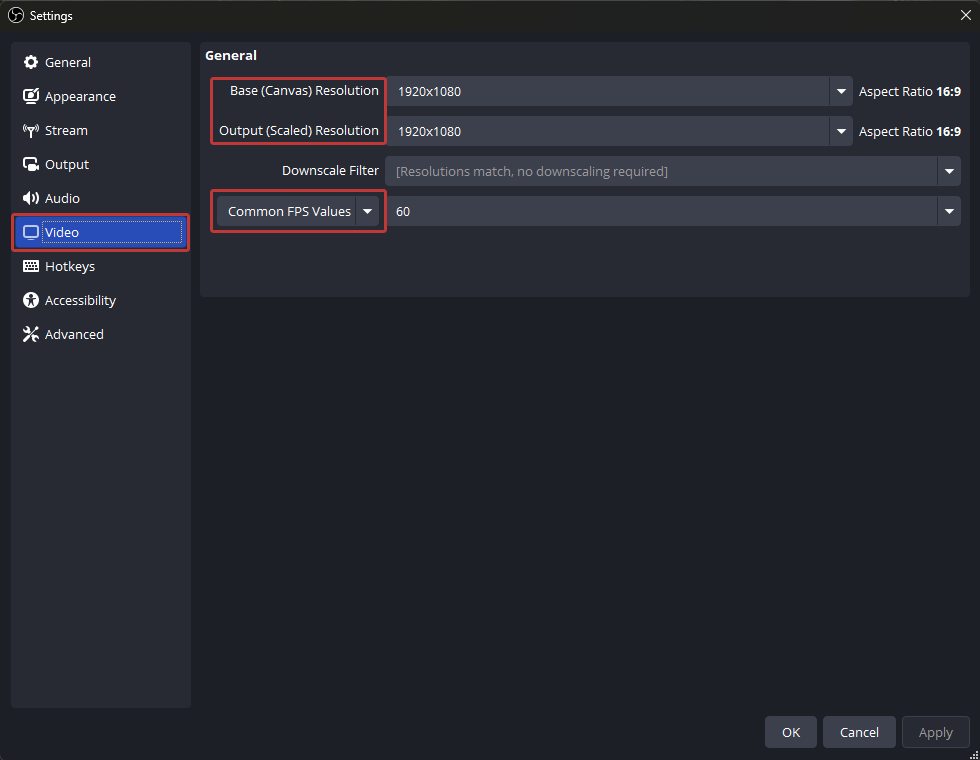
Under the Video tab is where you will set up your base resolution and your output resolution. Base resolution can be set as the same as your primary monitor’s resolution (1920x1080p for example). The neat part about output resolution is that you can either set it to the same as your base resolution, or you can choose to downscale it.
Downscaling is beneficial when network speeds do not allow for a 1080p stream but support 720p. One thing to consider are platforms’ maximum supported resolutions. Twitch only supports up to 1080p, while YouTube supports up to 4k. If you are streaming from a 4k monitor to Twitch, the output will need to be downscaled.
Frame rate will also be dependent on maximum upload speed. If a choice between 1080p 30fps and 720p 60fps has to be made, it is recommended to go with 720p 60fps since higher frame rates will help the stream look smoother.
Audio
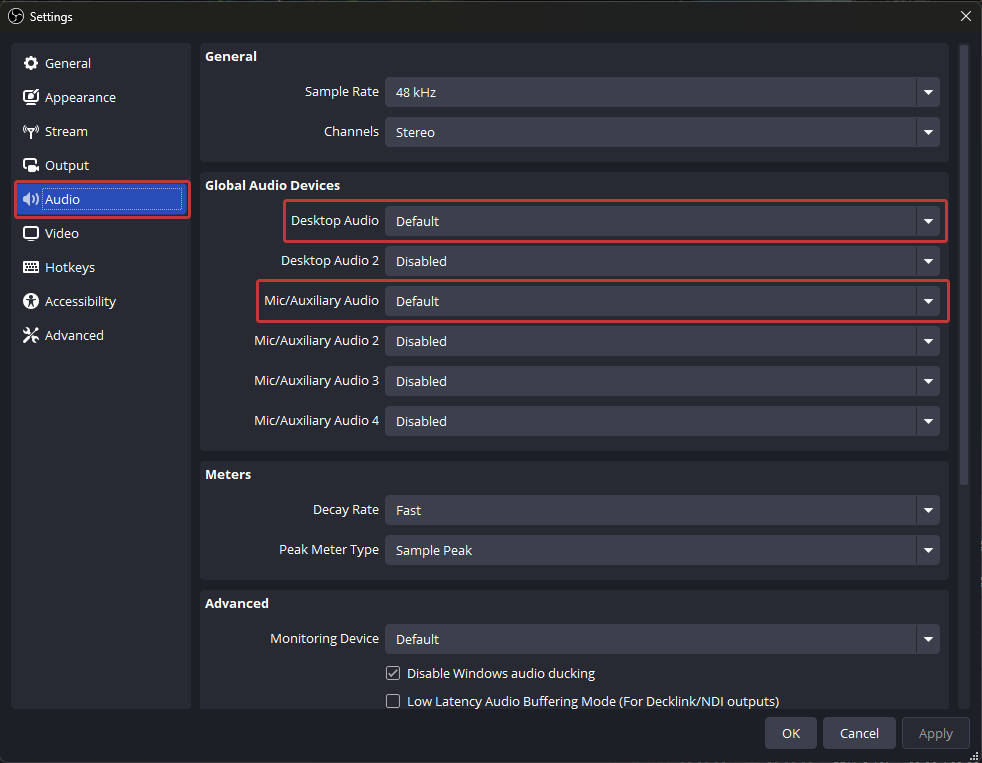
Audio adjustments can be made under the Audio tab. By default Desktop Audio and Mic/Auxiliary Audio are set to system default. Both of these can be changed, if needed, and additional audio devices can be added here.
Once finished, hit “Apply” and then “OK” to return to the main OBS program.
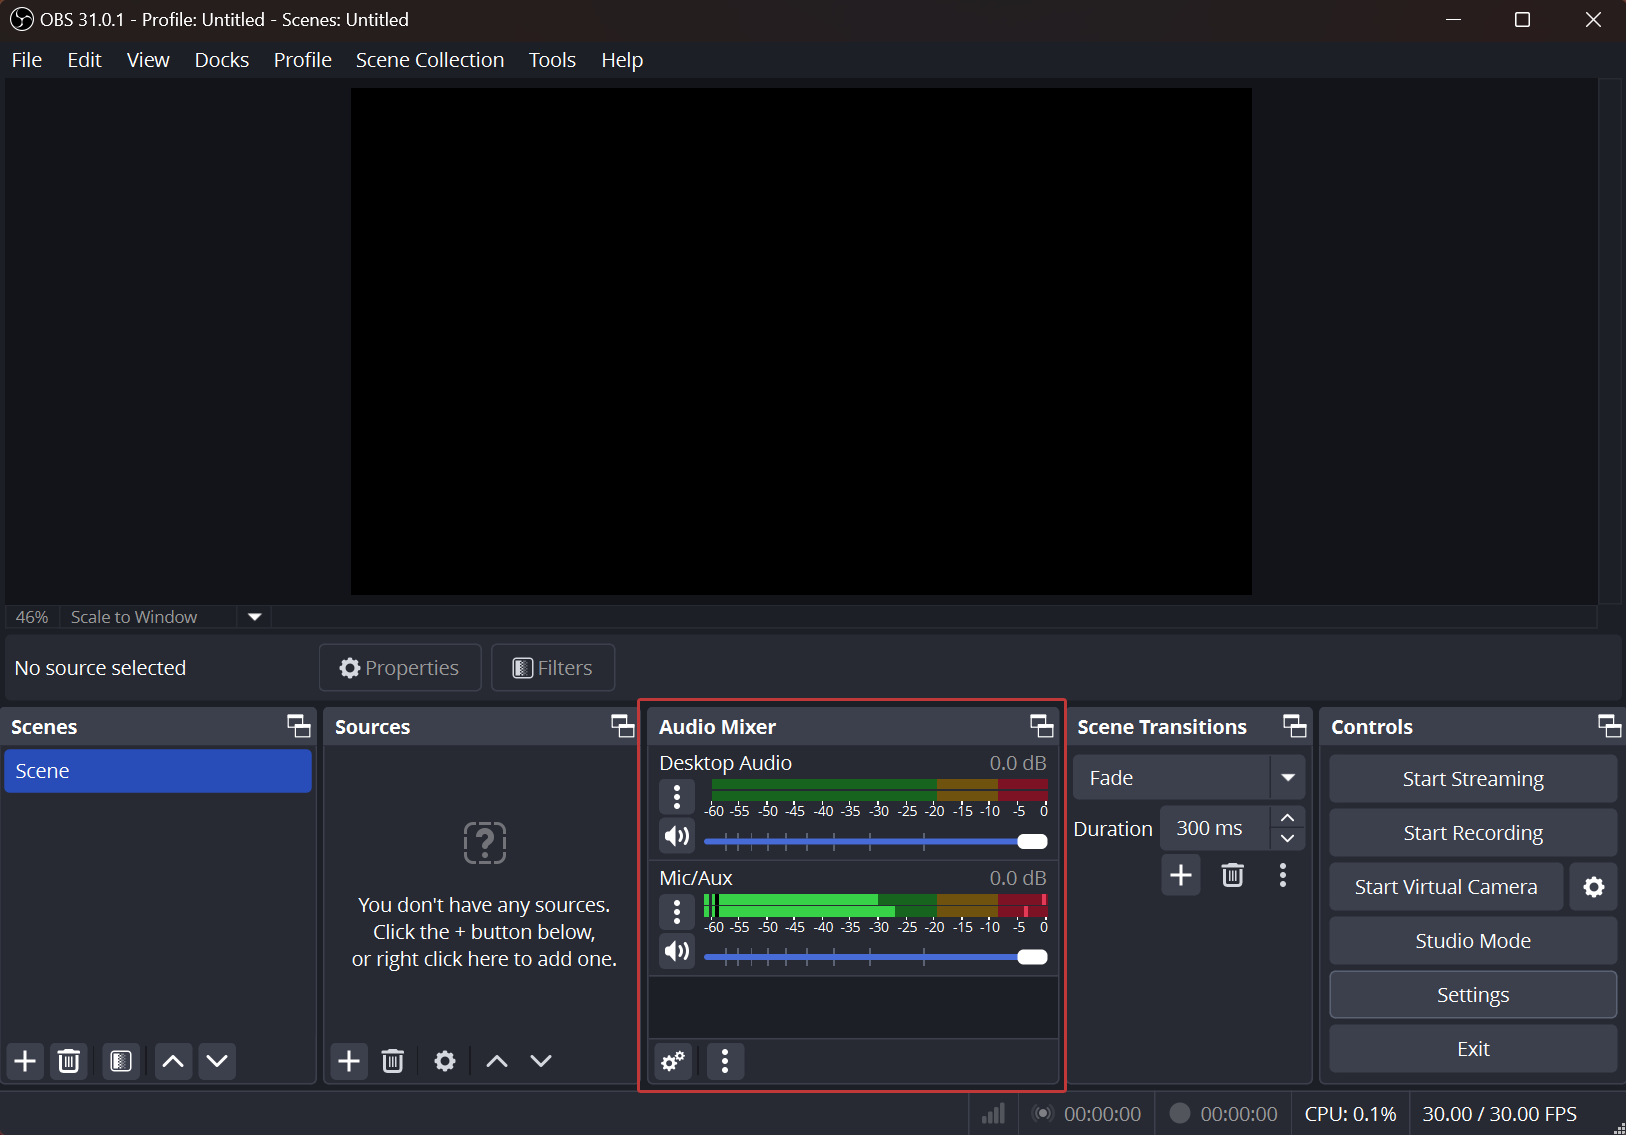
Audio can be monitored and adjusted under the Audio Mixer dock.
Scenes and Sources
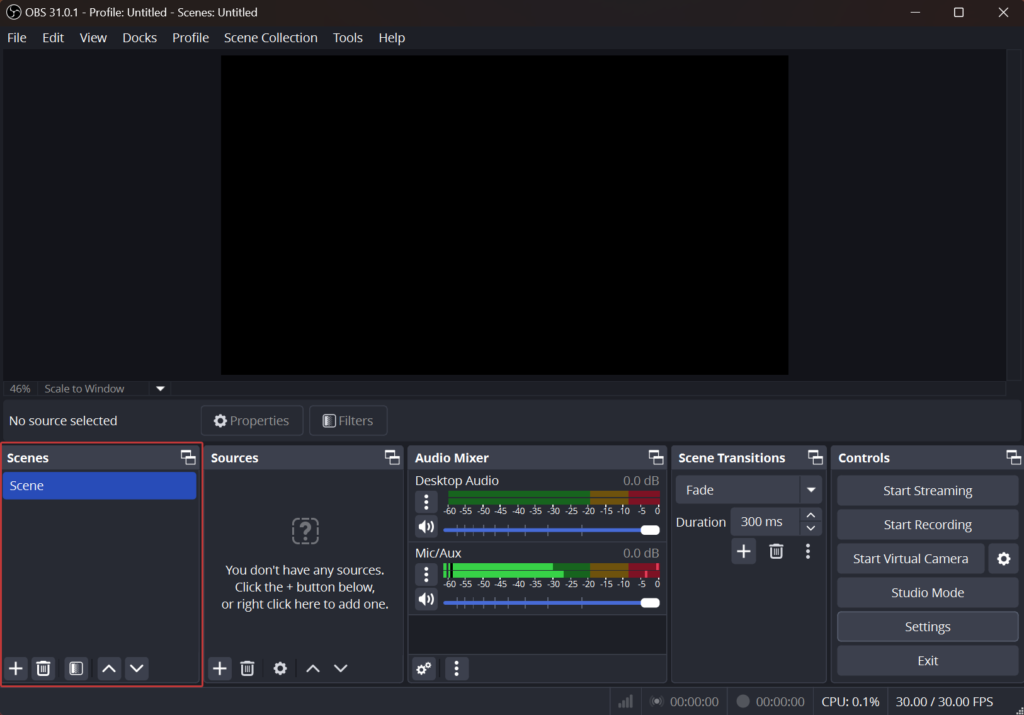
The purpose of scenes is to allow you to easily switch between different predefined scenes that contain different sources. An example would be one scene setup as a starting scene containing an intro graphic and another scene setup as a live source with a desktop capture or other source. Working with and adding scenes is simple to accomplish under the Scenes section in the lower left hand corner. By default, OBS adds a scene called “Scene.” This scene can be renamed by right-clicking and selecting rename.
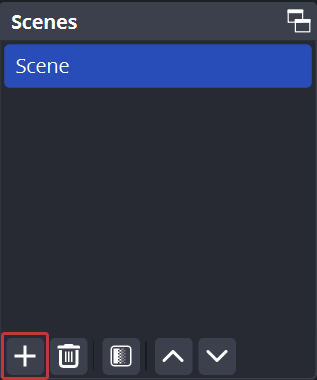
Additional scenes can be added by clicking the + button.
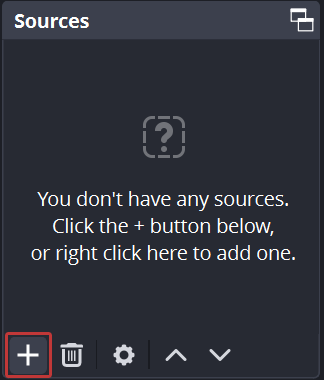
Once a scene has been created, sources can be added to it by selecting the scene and then clicking the + button under the Sources section.
There is a large variety of sources that are available to add depending on the equipment being used. A desktop capture source will capture the monitor screen that is chosen and anything displayed on this screen will show up under the captured source. In contrast, an application capture will only capture and display the chosen application. Desktop capture is a convenient way to display whatever is on your screen, but uses more CPU power, so it might not be the best option for everyone.
Browser sources are a great way to add alerts and chat overlays to your stream. Streamelements is one of several companies that makes it easy to add alerts and chat overlays.
Scene Transitions
Scene transitions are what happen when you go from one scene to another. By default, OBS has two transition types: fade and cut. As the names imply, the fade transition fades between two scenes and the cut transition hard cuts between two scenes. Fade has a duration option that allows you to select the time it takes to fade from one scene to another. Shorter times provide quicker transitions, whereas longer times provide slower transitions. Custom transitions can also be added using the + button.
Conclusion
Once all these settings have been configured, you are ready to hit the “Start Streaming” button under Controls and begin your livestreaming journey! I hope this guide has been helpful, and if you have any suggestions for future guides, tutorials, or other content creation related content, please let me know in the comments below!